Tuesday 20 August 2013

Week 4 - Environment Task

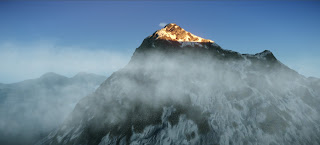
Mount Everest in Crysis
Mount Everest in Crysis with thicker clouds
Mount Everest Photo
It was straightforward from Geocontrol to crysis however when I tried to get a shadow from the terrain it wasn't able to, perhaps it was a large map or settings of the imported terrain. So when I asked help from Vinh Nguyen and basically reproduced the scene by faking it. We place a light and an object to create a shadow that falls on the mountain. The rest of the scene such as clouds and sky was simply altering with the settings of the environment in crysis. 

Week 3 - Landscapes


Observation on the River Wye

The Humble Administrator's Garden

Capability Brown Stowe Landscape Garden

J.M.W. Turner, Heidelberg, c.1846. Watercolour, gouache and pen and ink, with scraping out on paper, 37.4 x 5.3 cm. Scottish National Gallery.

Capability Brown Dam

Tuesday 6 August 2013

Week 2 - Independent Study

5 Reference Images

Eilean Donan Castle, Wester
reference: 


reference:
Bay of islands
reference:

"This is the best road in the World !" Transfagarasan Road
reference:

The Grand Pacific Drive on the NSW south coast
reference:


Week 2 - Weekly Task

Geocontrol 2

Letter: E
Number: 0

Using Geocontrol2 for the first time and I love how this program works in creating terrain with ease.
It took trial and error process to get to the desired landforms for my island. I've included the graph for those who wish to have similar qualities land formation.


Monday 5 August 2013

User Interface Panels – Overview

Identifies 5 shortcuts or buttons

  1. 1. Shift + Space bar: Turns helpers on and off.
  2. Ctrl + C: Clone selected object.
  3. Ctrl + Shift + S: Save an object(s) to the game folder.
  4. Ctrl + F: Unfreezes all frozen objects Ctrl + H: Unhides all hidden objects
  5. DB Button = opens up data base view
  6. Number 1 = Select and Move, Number 2 = Rotate, Number 3 = Scale, Number 4 = Select Terrain

Viewports

3 Different ways of moving around your level 

1. Keys to move around the viewport

W = Forward
A = Left
S = Backward
D = Right

Press shift to move faster
Right click the mouse button to look around
Click middle mouse button to pan around
Scroll wheel mouse to zoom in/out

2. Press "Q" to turn on/off the option to go through objects

3. Go To Position - gives you the exact coordinates of your position and allows you to copy and paste it to be able to go back to it.
5 ways you might customize your Sandbox editor setup

  1. Click and Drag the windows on top of each other and organise them into one window or separate to desired position .
  2. Windows can allocated anywhere the user want to be located.
  3. Tools bars can be turn on/off.
  4. Go to "Tools" - "Customise Keyboard" to customise your own toolbars and commands.
  5. Turn on "enable back up" to save file automatically.

Overview Of The CryENGINE 3 Sandbox User Interface

  1. The rollup bar located at the right hand side of the screen which contains tools for create object and editing terrain for in game environments
  2. Go to display drop down menu or press F3 to open wireframe mode.
  3. X, Y, Z are the coordinations for the axis of the editor the user is working in.
  4. Lock selection - you can select an object and click the "Lock Selection" button to lock it, this means you can only work on the object you have selected.
  5. You can change the speed of the viewport by changing it in the input box in the status bar. Higher number means faster speed.
  6. User can customize the interface layout - under configure layout, which user can set multiply view in the layout settings e.g. perspective/ top/ front and left view.
  7. Config Spec - Very High to Low for graphics settings. Best at low to reduce waiting time and lag
  8. AI physics allows you to be on the game mode and can still edit it.
  9. "GoTo Position" allows you to get the coordinates of your location so you can save it and go to that exact location when you want to.
  10. Ctrl + G turns on the game mode.

Getting Started And Folder Structure

5 things I learned about the Sandbox folder structure.

  1. CryEngine are compatiable with 32 and 64 bit systems. I'll be using 64bit to make the most of my RAM.
  2. Editor - Not to be used
  3. Code folder has example code and such. Logs, temp, testresults aren't very interesting folders.
  4. .cfg files are configs. Will be left alone unless needed. If I want to edit cvars I should make a new user.cfg, a good one to add would be r_motionblurshutterspeed 0. Gets rid of the distracting motion blur
  5. Tools folder. Run the settingsmgr.exe to enable CryTif and Geocontrol to work together.